Honda / Acura K20a K24a Engine Forum banner

My EG, quick progress swap and type R stuff

26K views 115 replies 31 participants last post by  neofreak  
#1 ·
Image

2years ago
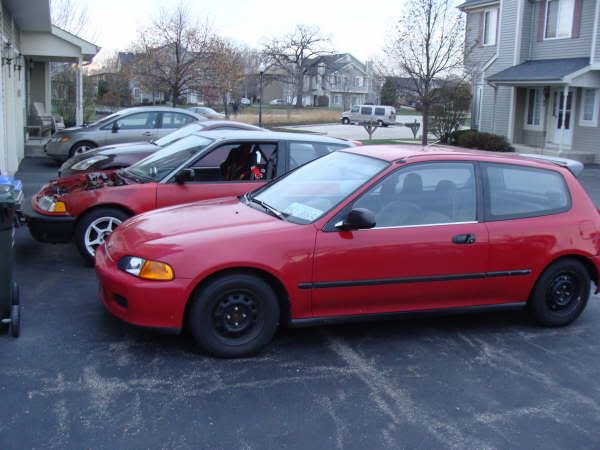
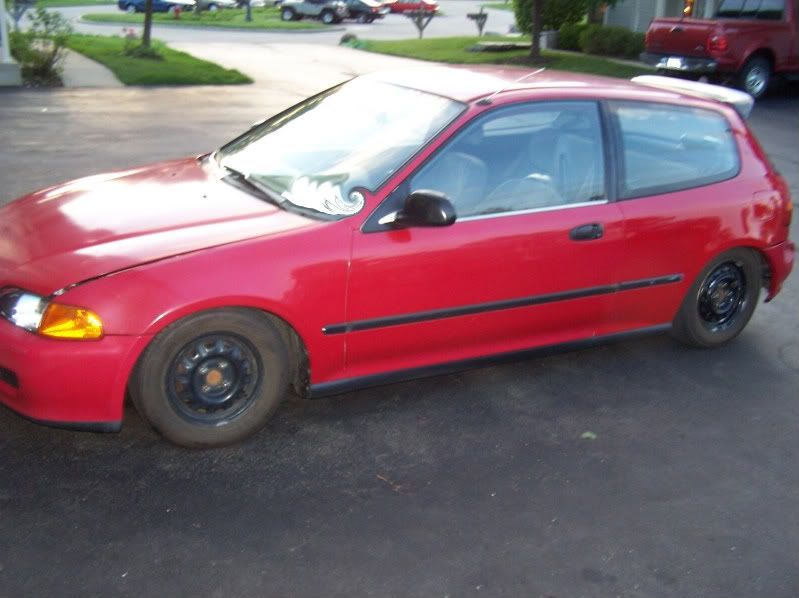
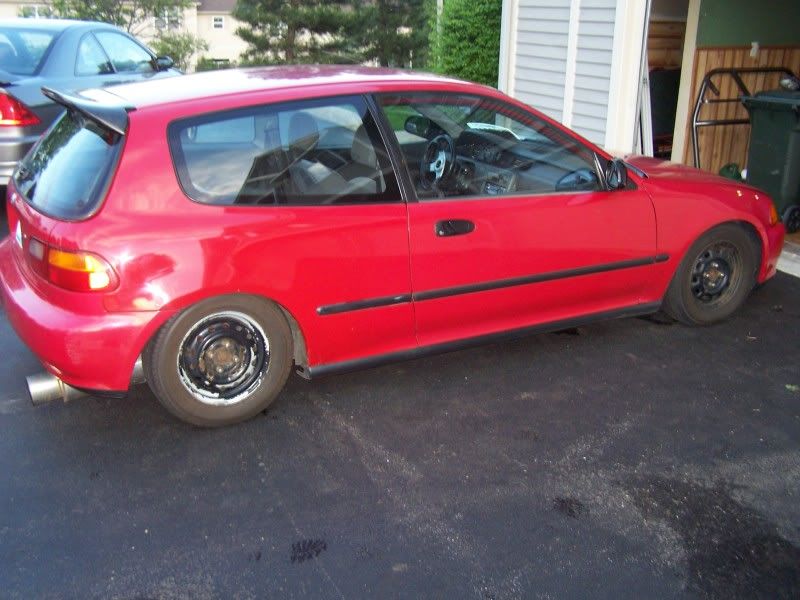
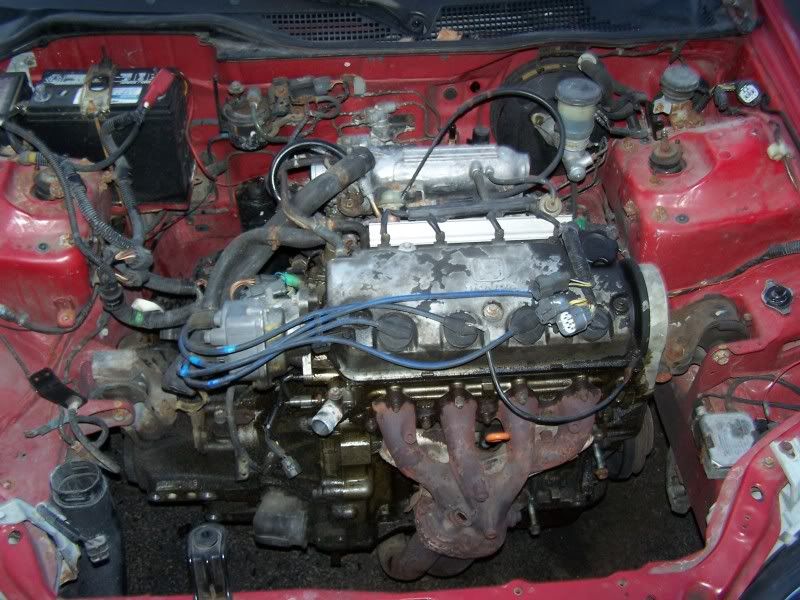
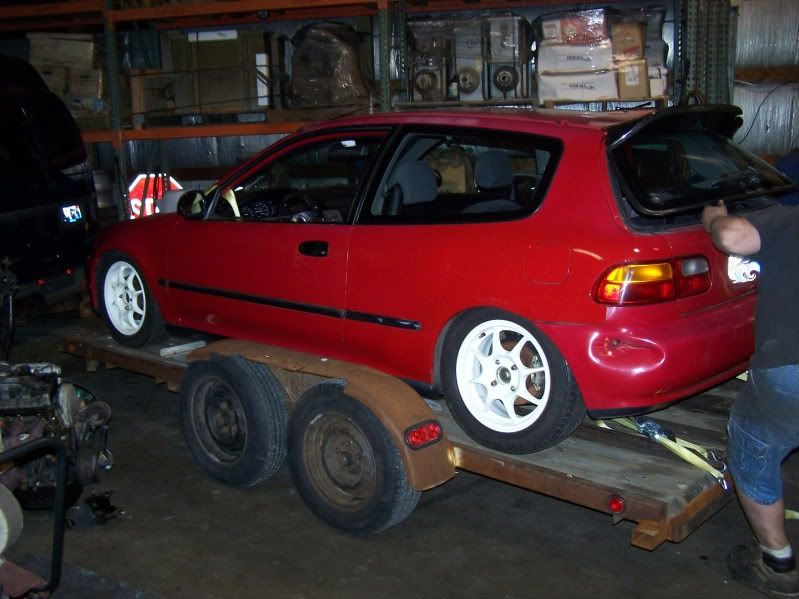
So the story behind this swap i find a bit amusing, this EG started out as my daily driver. It was a single cam non-vtec D15 turd. But it got me around while i was building my old EF race car. The original motor started burning a lot of oil so i swapped in a D15B i got from a friend for $100, i picked up some teins at the same time, so i threw those on and put my kosei's off my EF on it

Image

Image

1 year ago

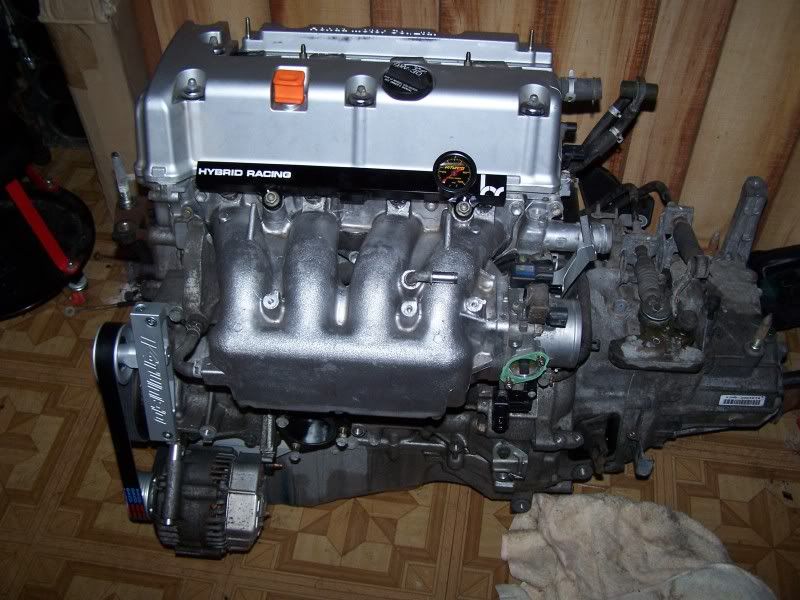
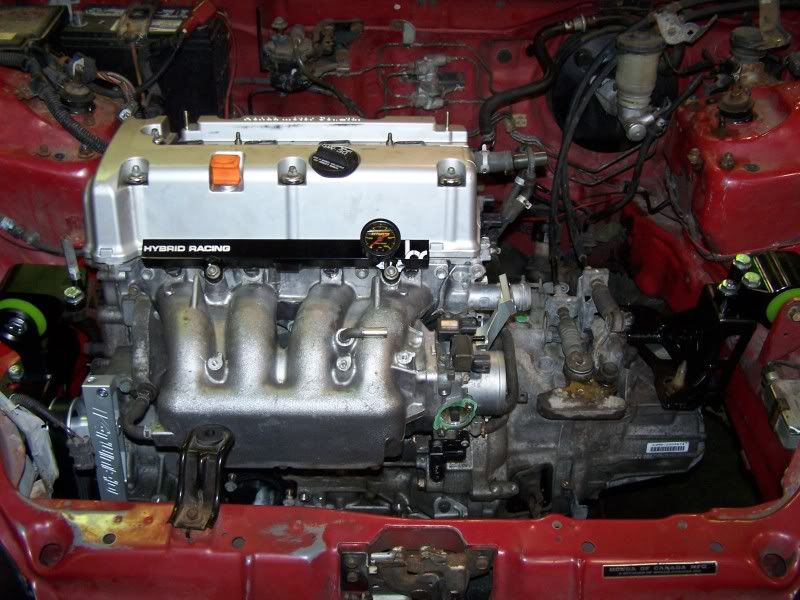
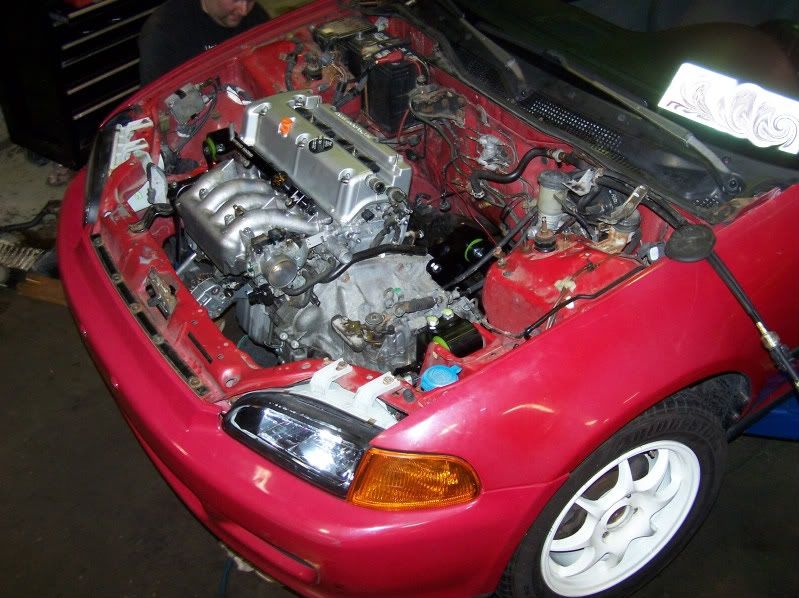
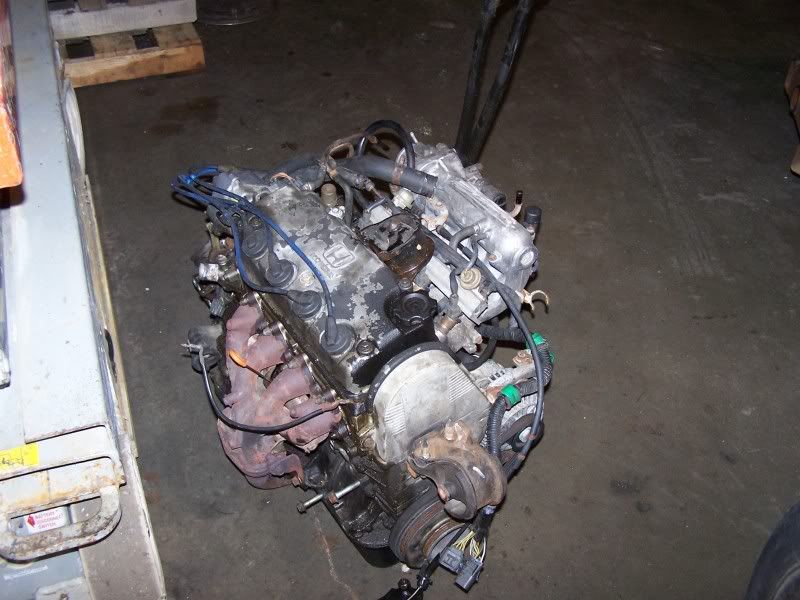
the D15B started to annoy me in its lack of power, so i ended up driving from chicago to mi to meet vietdragon and buy his B20 and GSR trans. Got back to chicago to hear that a friend of mine was getting rid of his K20A2 because he went to a K20A. Immediatly sold the B20 and went and picked up the K20A2. That all took place around november and i bought the K20A2 in December. From there i just began collecting parts. I dealt with both Mike@Ktuned and the guys over at Hybrid Racing, both great companys :up:.

the parts i have:
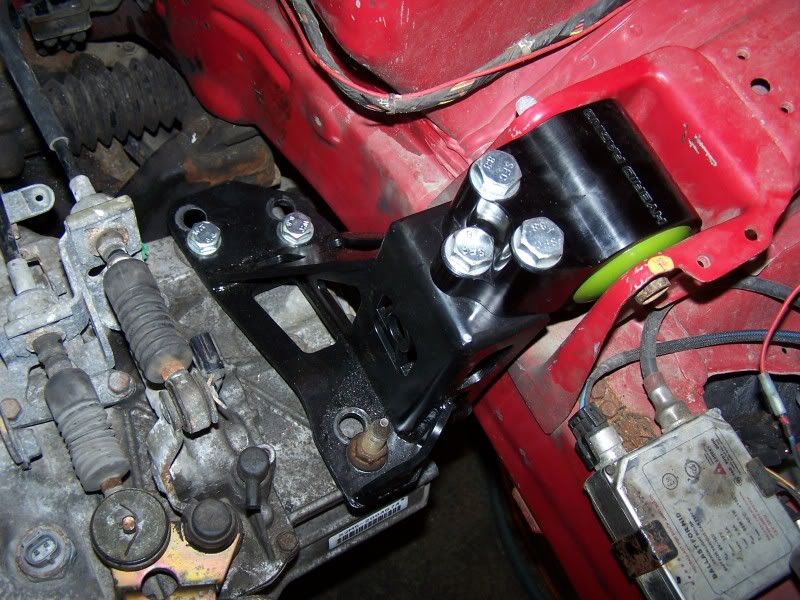
Hybrid Racing Black Anodized mounts
Hybrid Racing Bolt in shifter :up:
Hybrid Racing Jumper harness
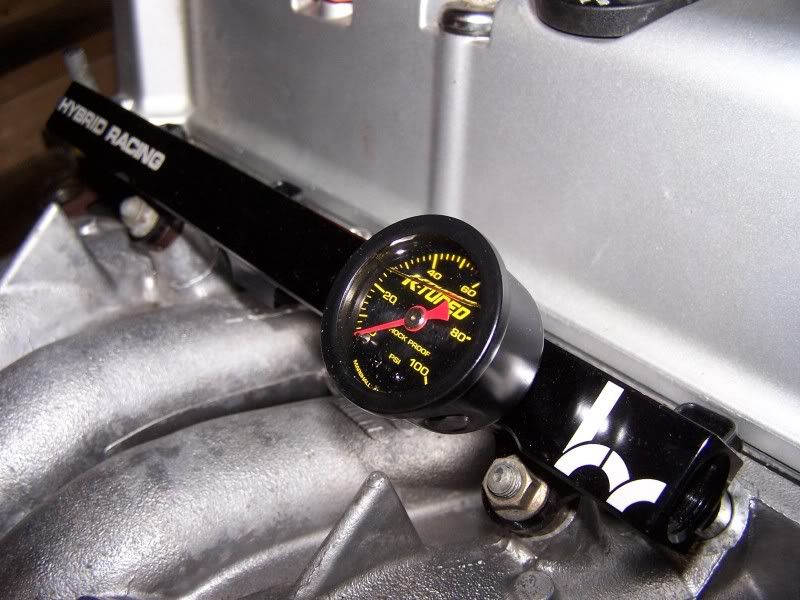
Hybrid Racing Fuel Rail
Ktuned Fuel pressure regulator
Ktuned Fuel pressure gauge
Ktuned A/C and P/S delete
Ktuned Billet throttle cable bracket and cable
Ktuned stainless clutch line
Ktuned thermostat housing
Ktuned passenger side radiator kit
Ktuned immobilizer bypass
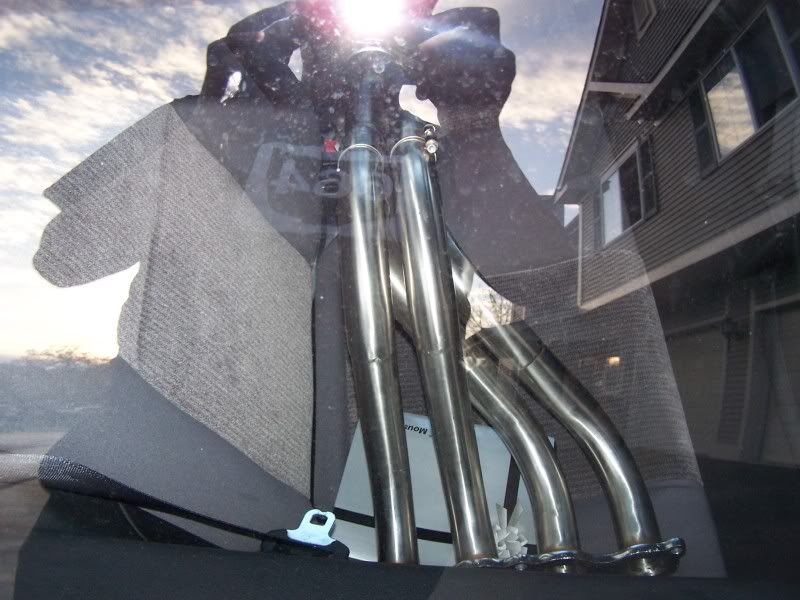
Swap header

Image

Image


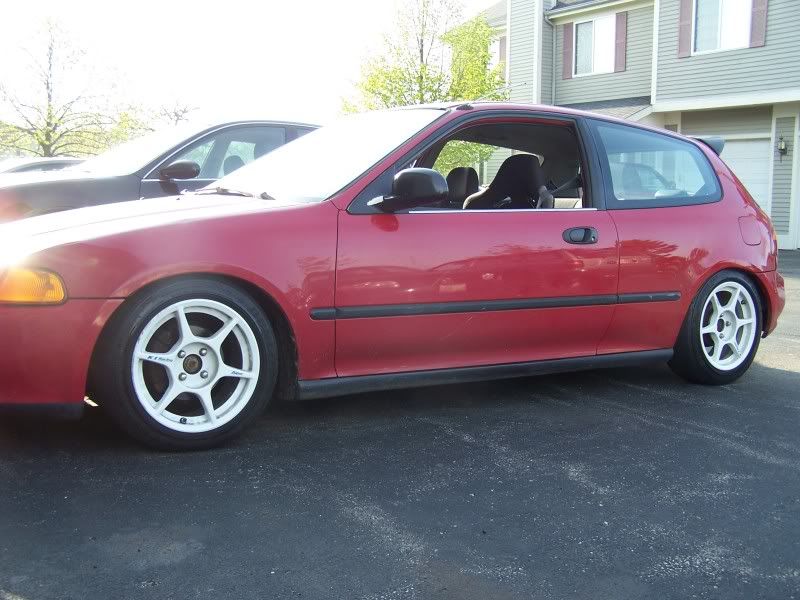
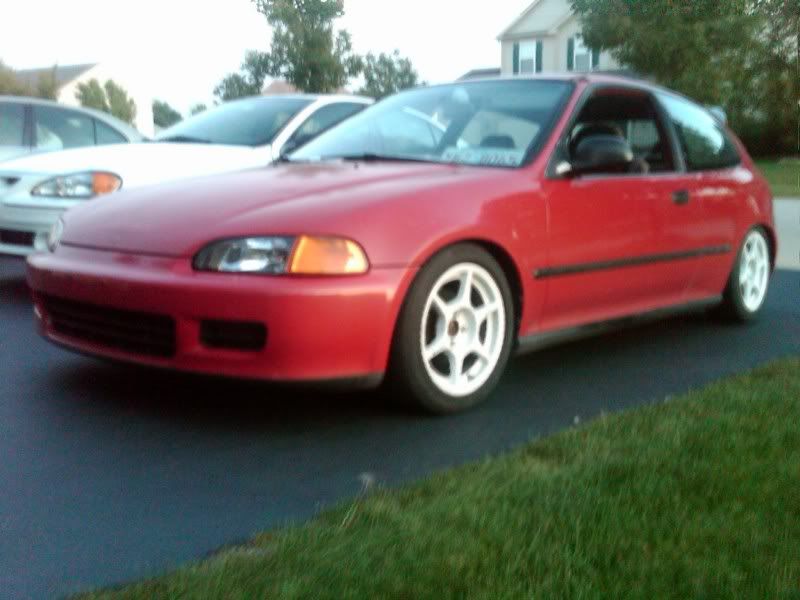
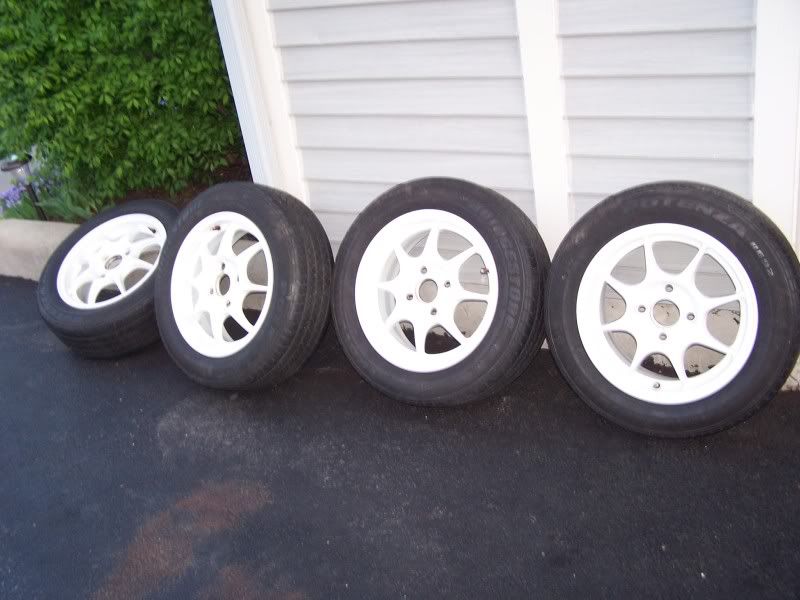
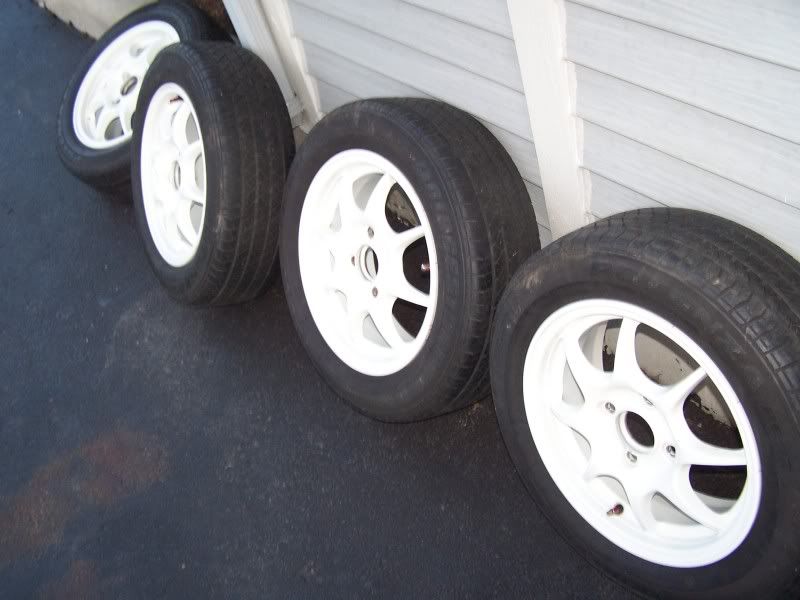
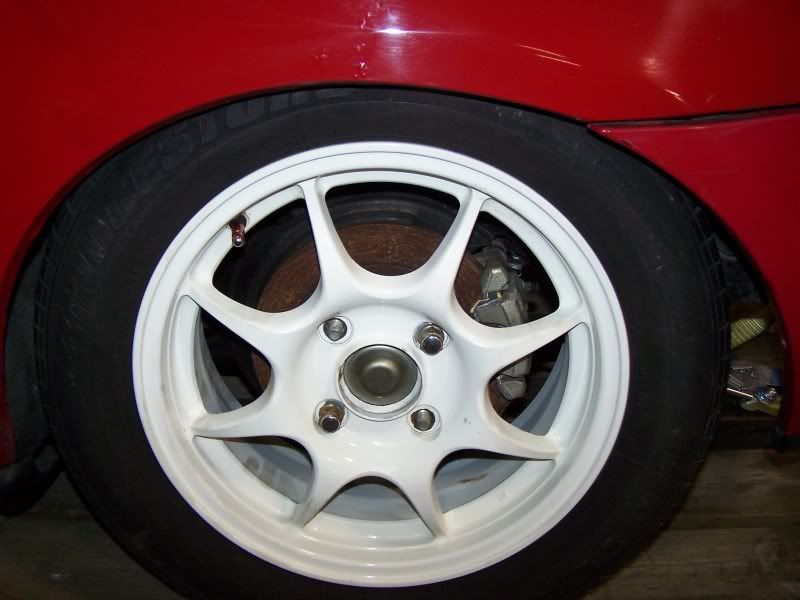
While parting out my old EF i managed to aquire a complete 4x114.3 type R conversion along with my favorite wheels of all time, a set of Sprint Hart CPR's
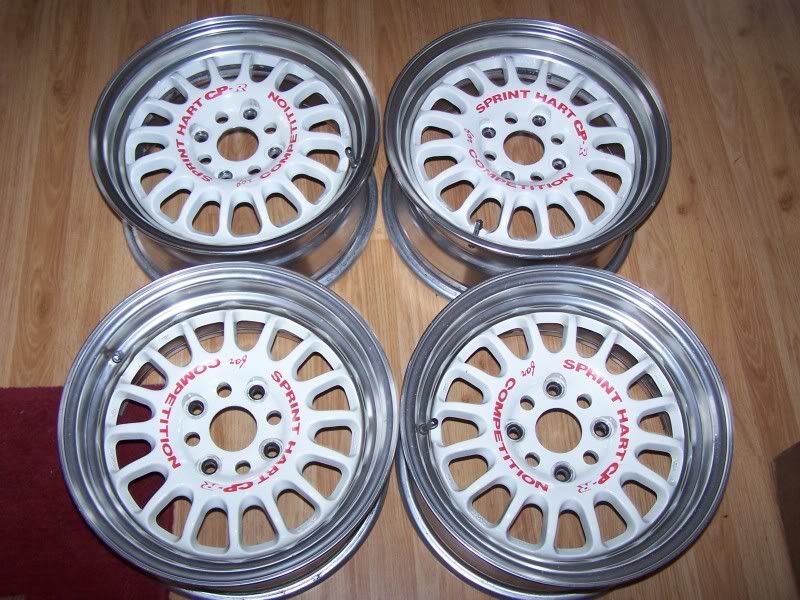
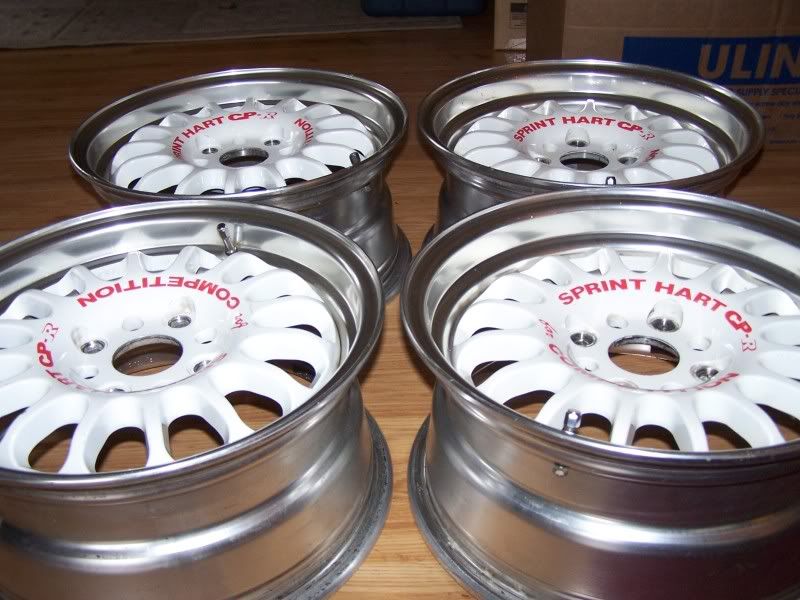
Image

Image

sizing:
15x7 +38 (front) 15x7 +22 (rear)

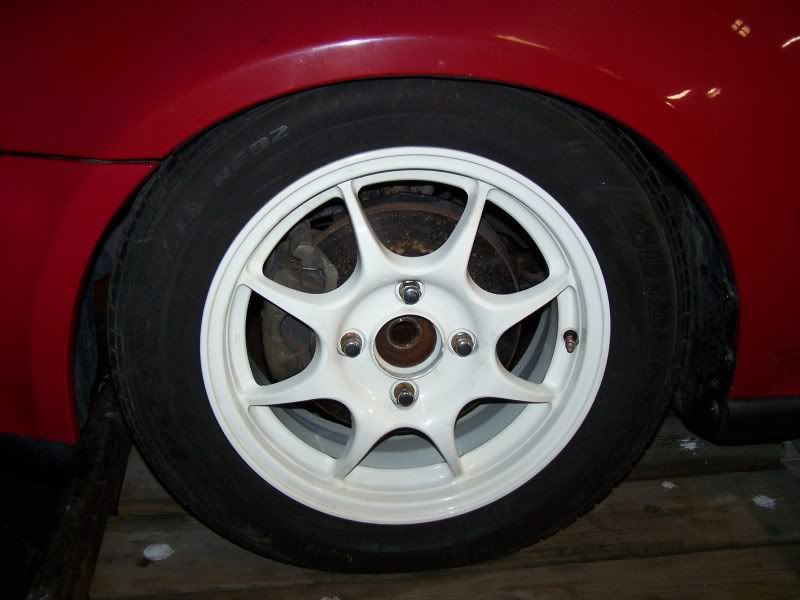
i also ended up comin across a set of 4lug White ITR wheels
Image

Image


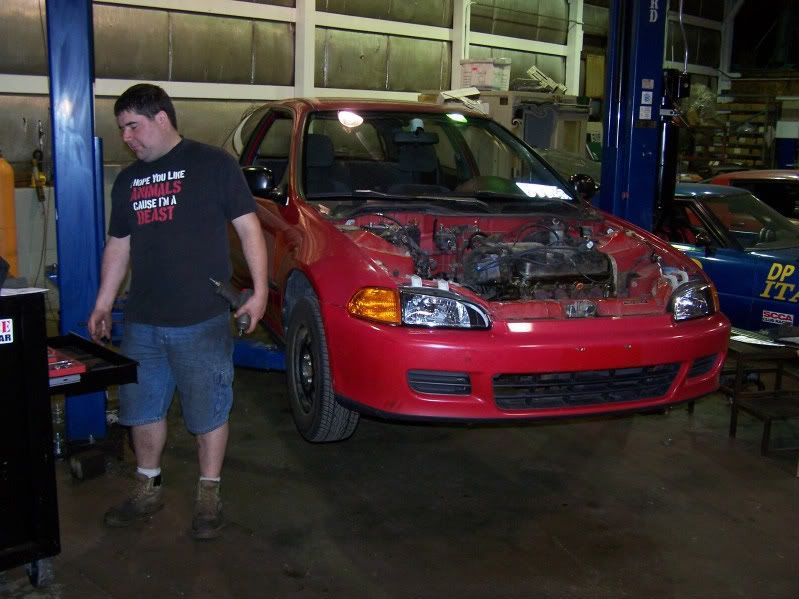
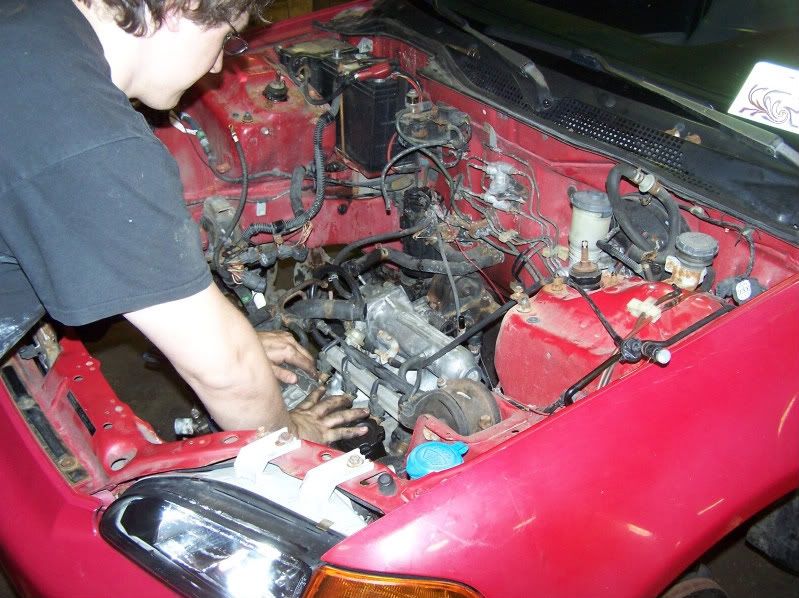
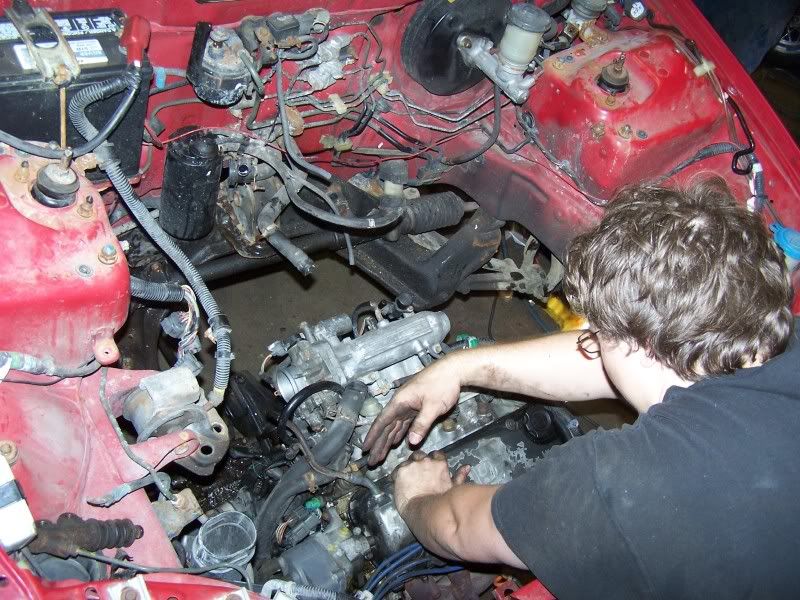
I started working on pulling the single cam out on Sunday
Image

Image

Image

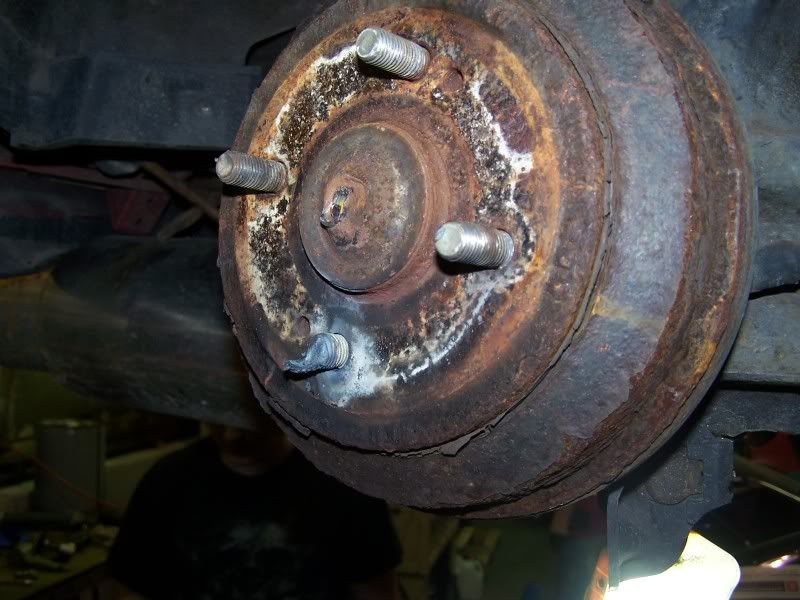
I ended up breaking my Matco 1/2 drive ratchet trying to take the axle nuts off, when my buddy Mike stopped by and asked me why i didnt call him to take the car over to his shop :rolleyes:. He left and came back with his van/trailer, and we towed it over to his shop sunday night at 7pm
Image

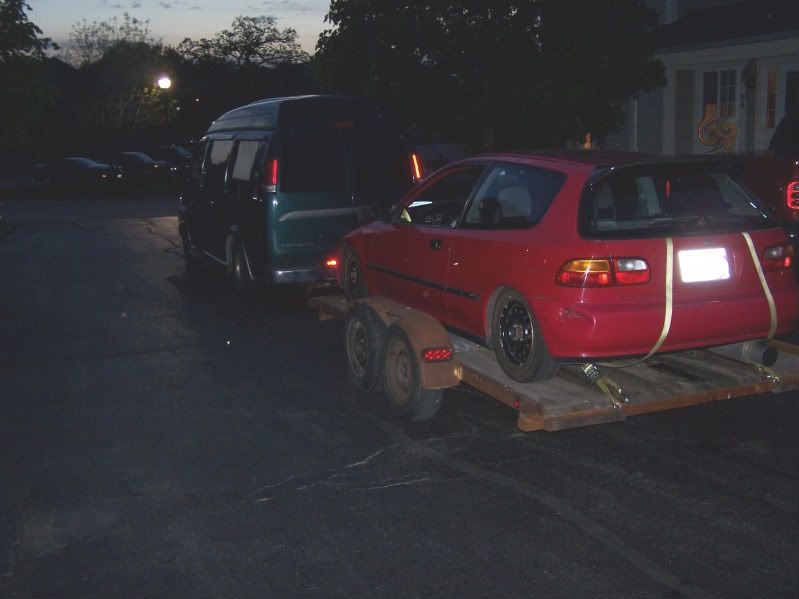
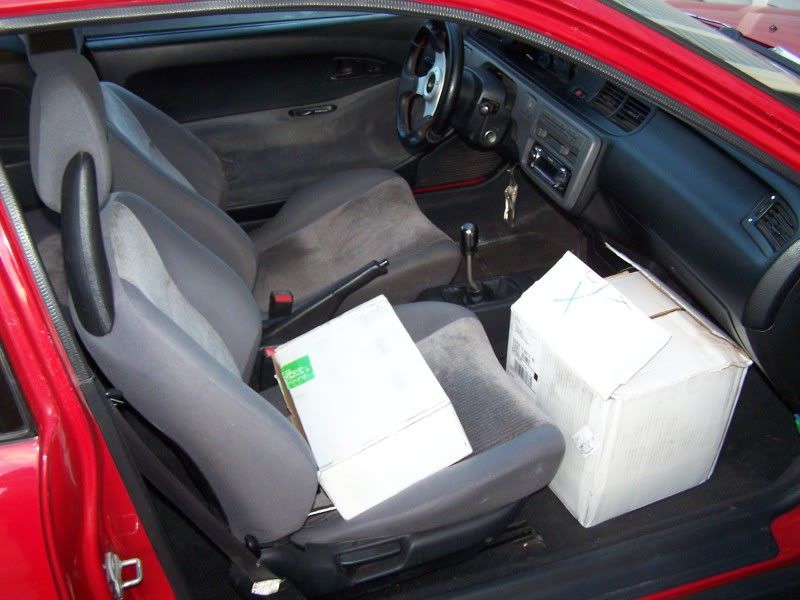
car loaded with parts
Image

Image

Image

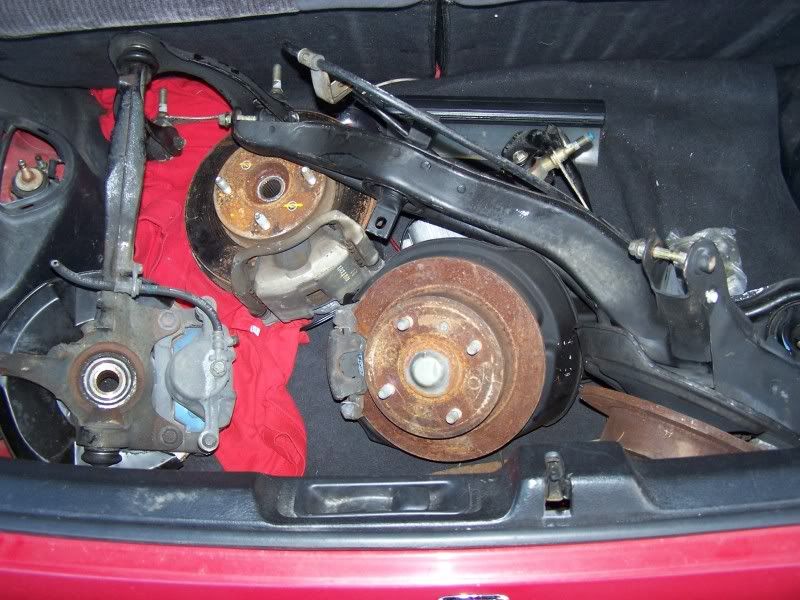
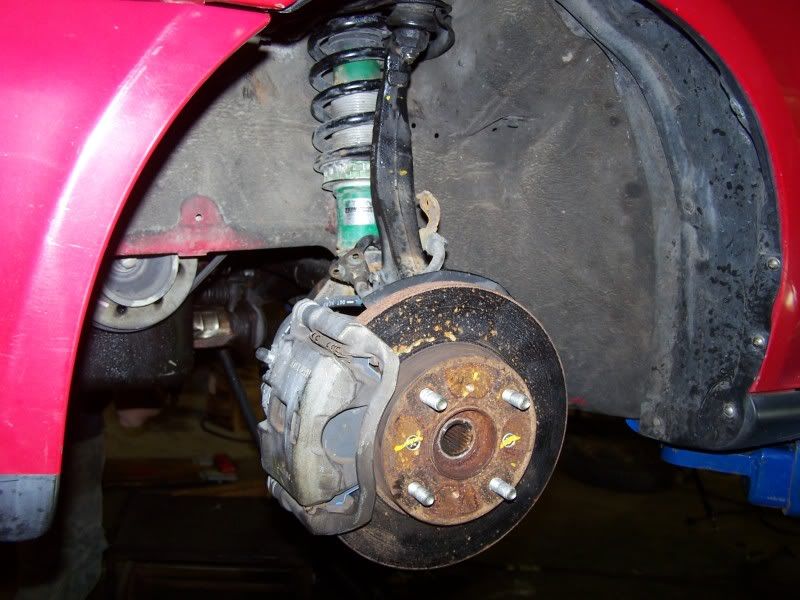
Since there was no way the axle nuts were comin off, we just decided to do the big 4lug at the same time as the swap, especially with having a lift.

Image


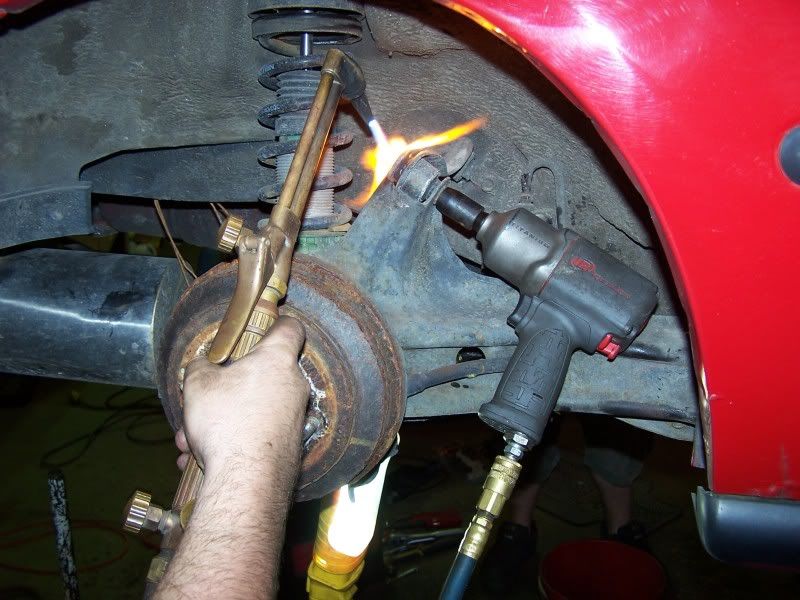
things got better as we started working on it when one of the lug nuts just started spinning the stud with it, thank god we were at the shop and had a torch
Image

Image


so onward with doing the rear disc conversion, thank god for the torch again
Image

unfortunatly the bushings were seized too so we actually ended up cutting the top ear off the rear trailing arms, again with the torch, and then cut the bushing out, again with the torch.
Image

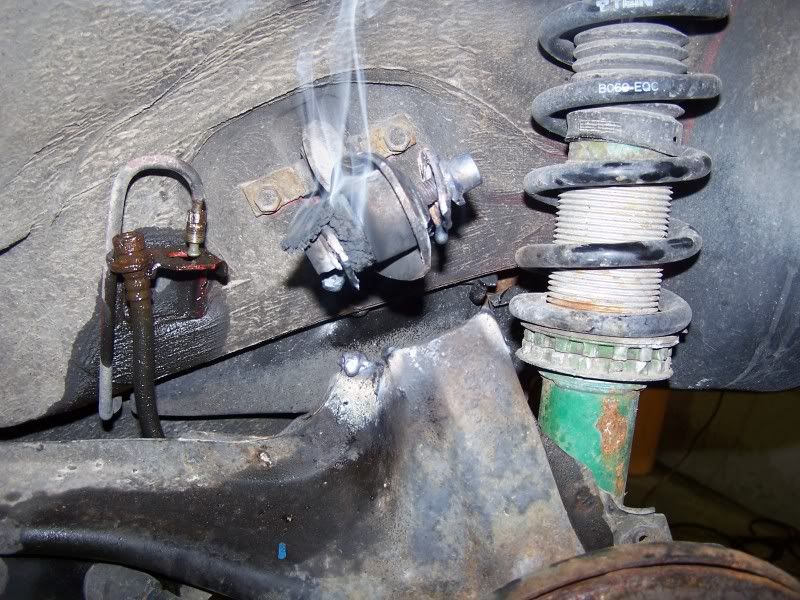
I have to get a rear camber kit now, just didnt have one at the time cuz i wasnt planning on goin that far, so for now and it to roll i needed the camber arm there.

Image


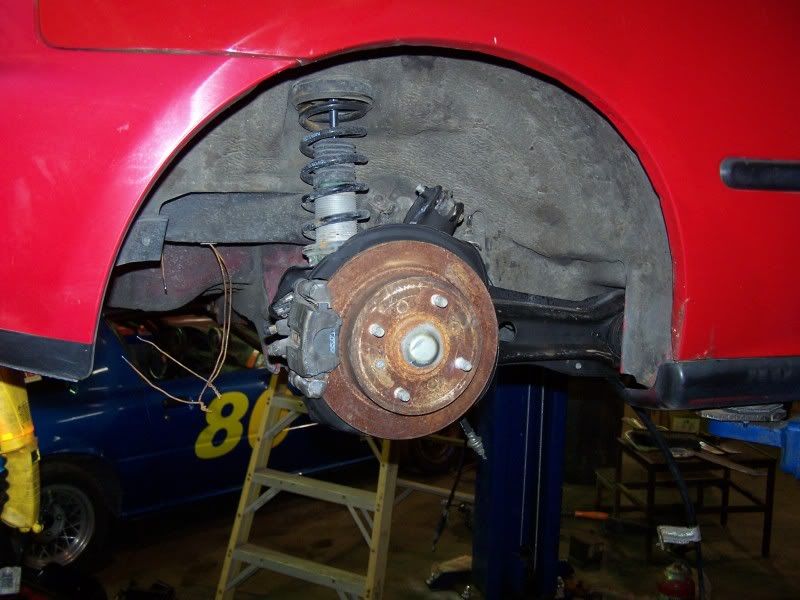
not much excitement up front, just unbolted the stock shit, pulled the axle with it and put the front conversion on
Image


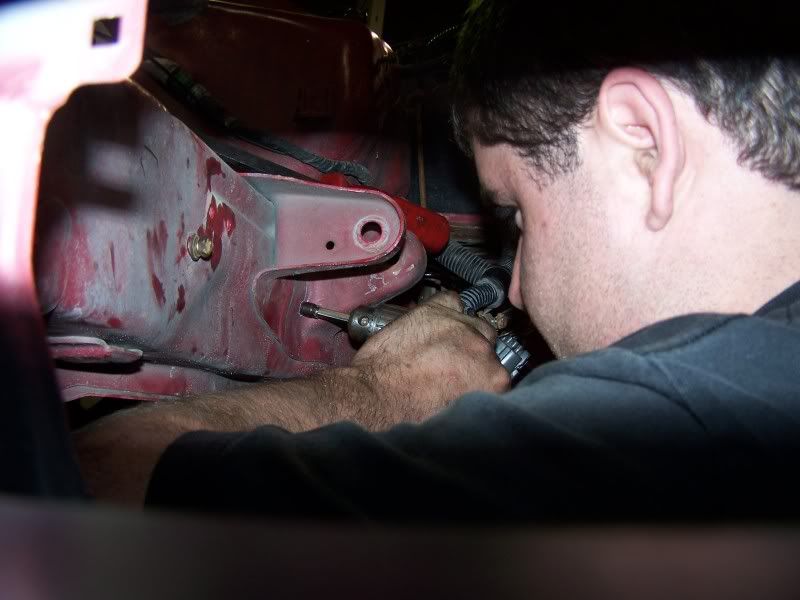
back to pulling the single cam
Image

Image

Image

Image

Image


installed the Hybrid Shifter, for some reason this is the only pic i took, i'll have to take more
Image


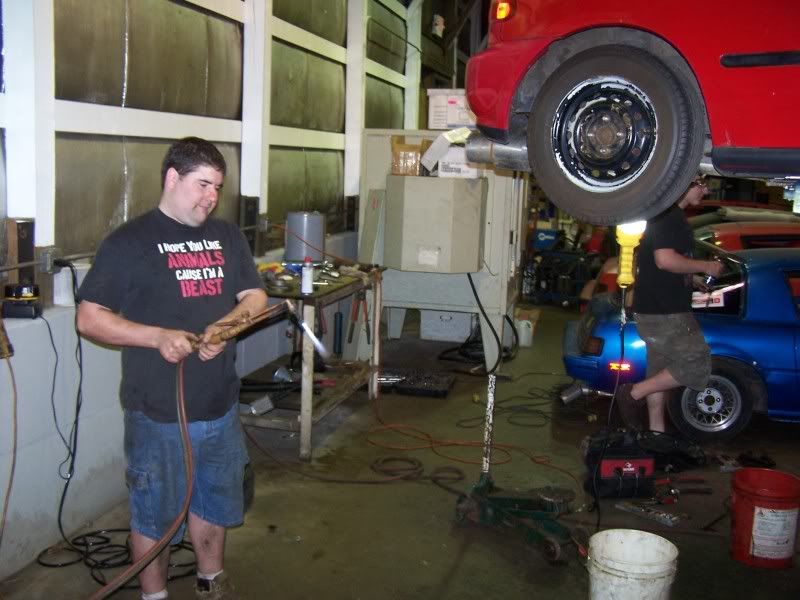
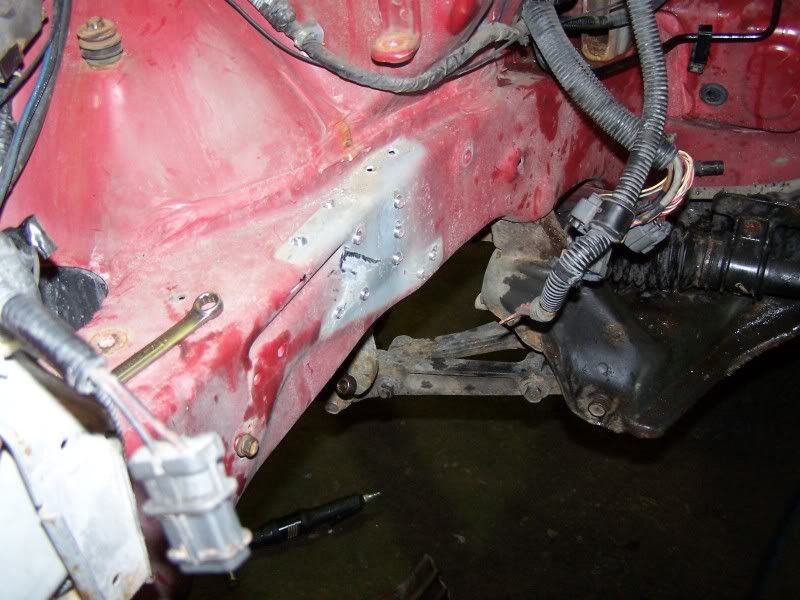
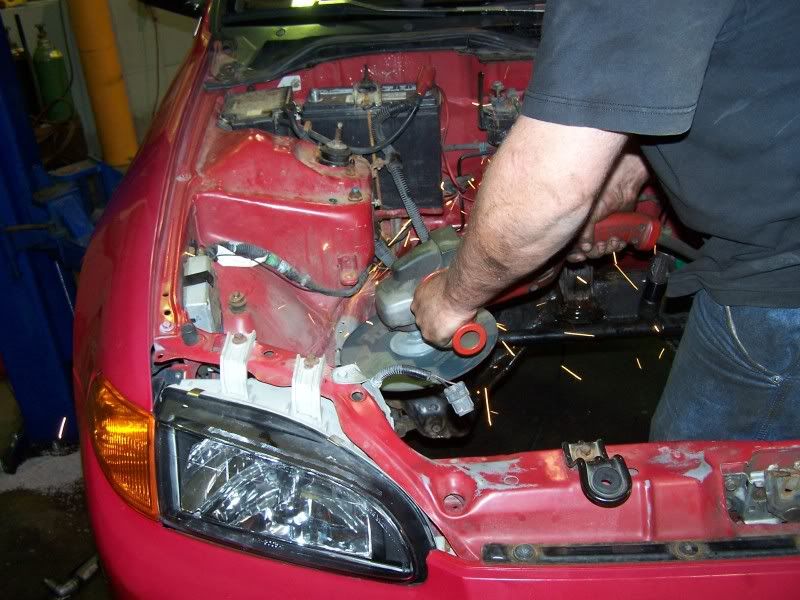
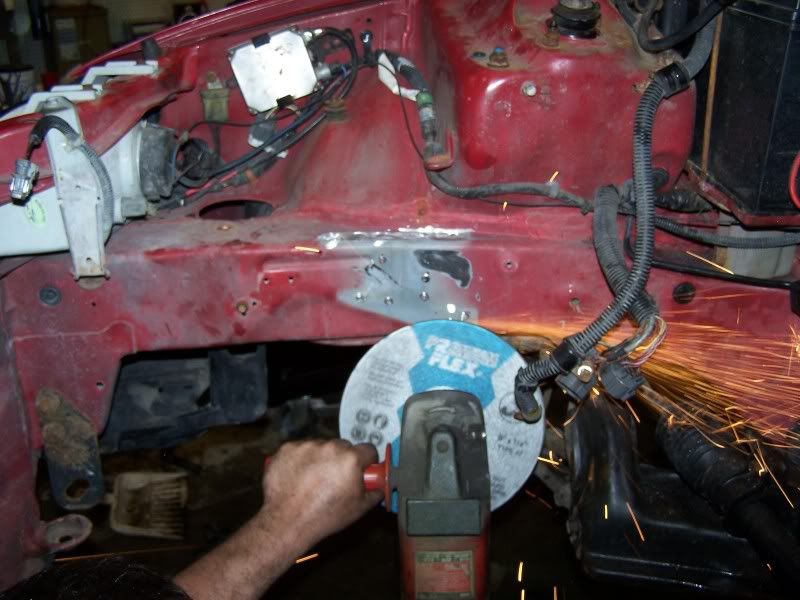
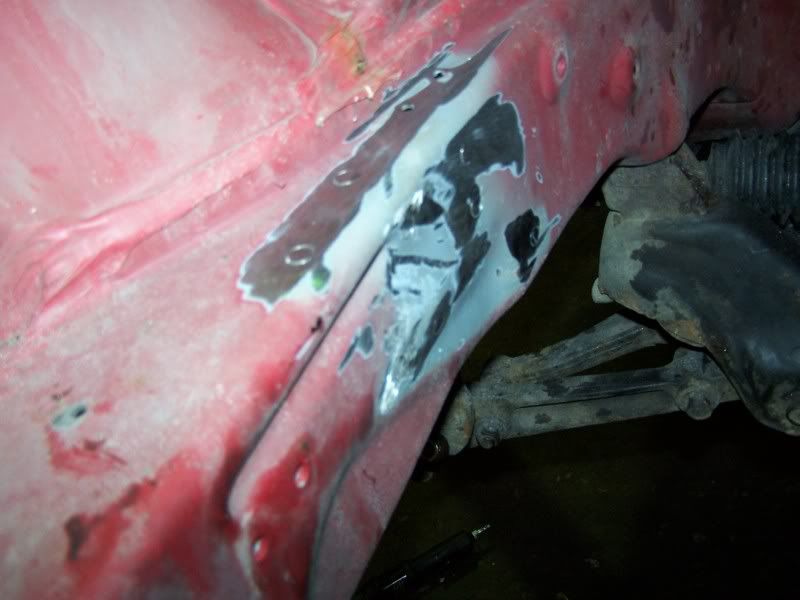
my buddy mike went to town cuttin and griding the passenger mount
Image

Image

Image

Image

Image


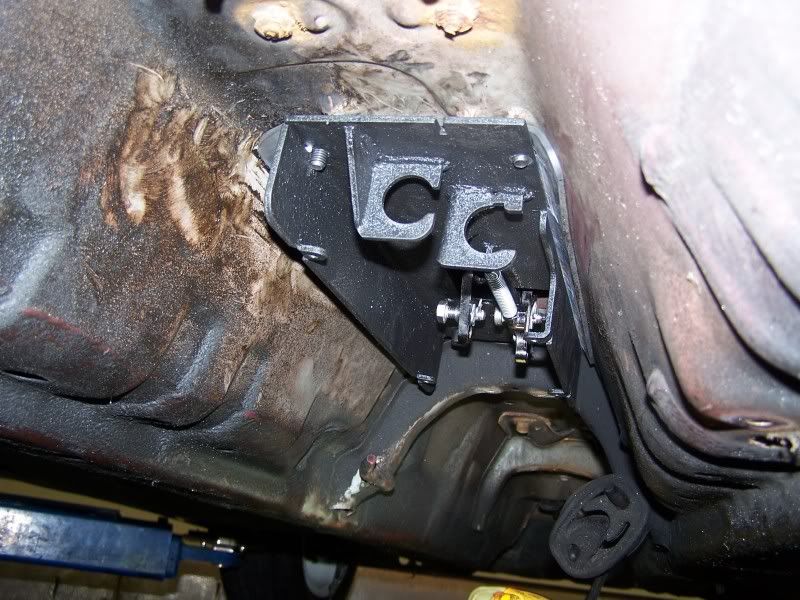
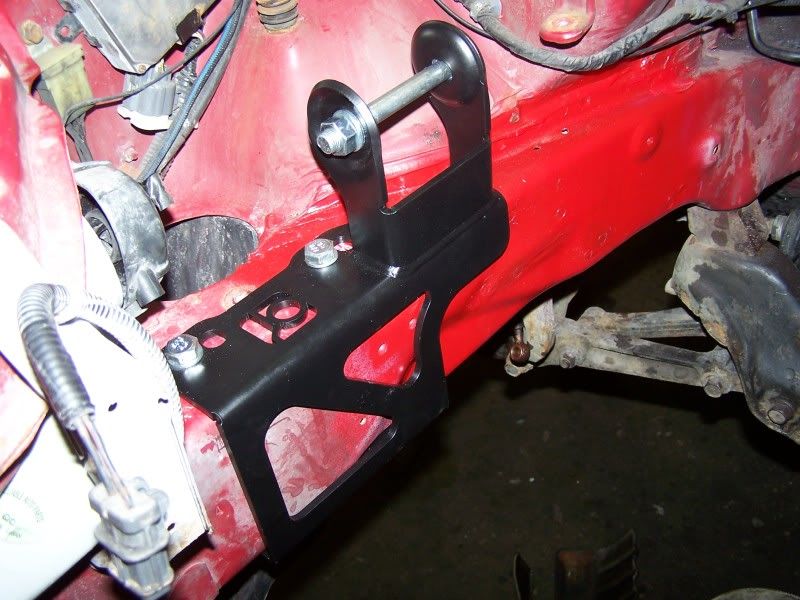
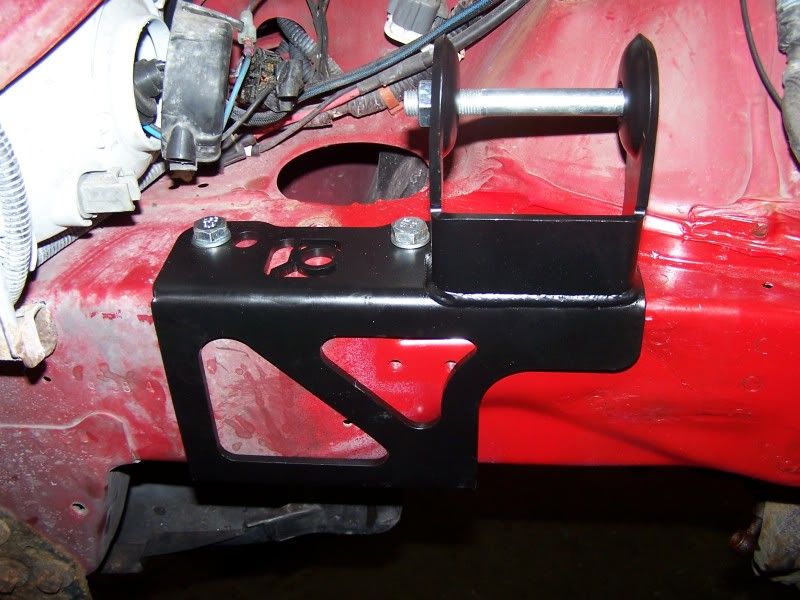
Installing the Passenger side Hybrid mount
Image

Image


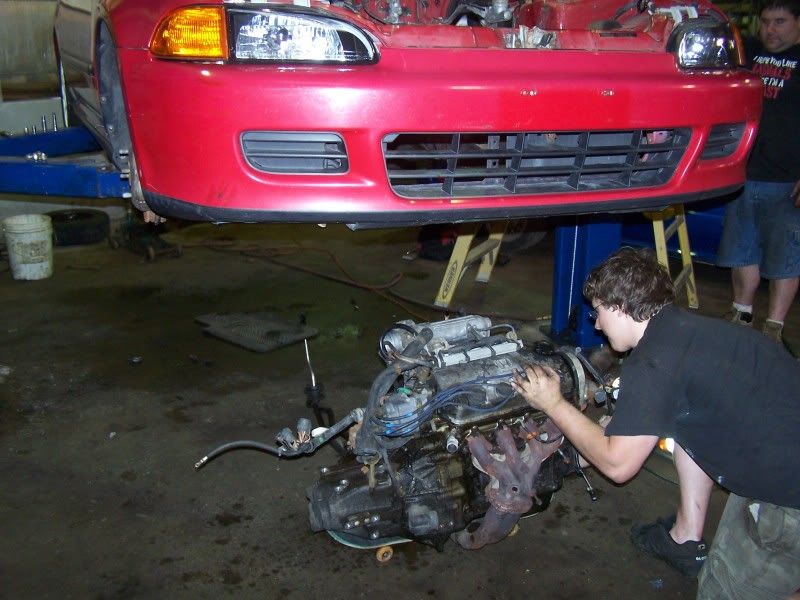
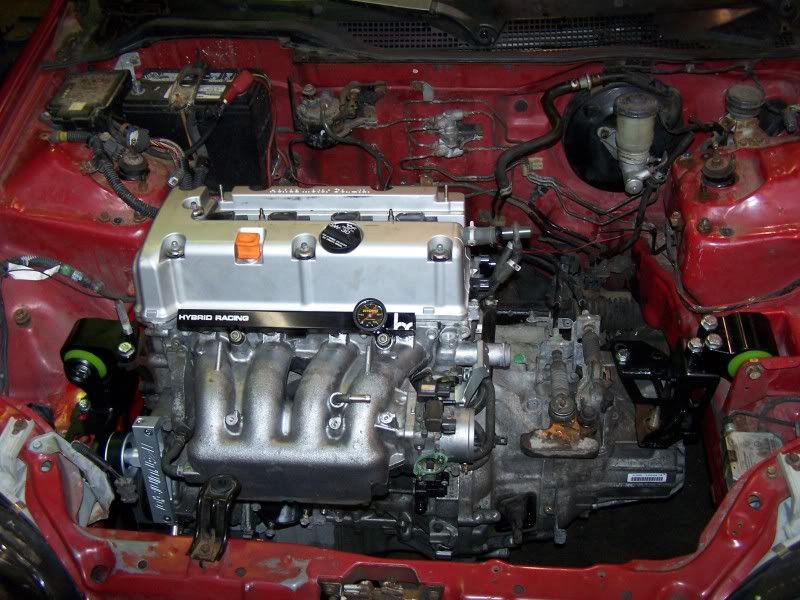
FINALLY! bolting the motor in
Image

Image

Image

Image


put the wheels on and put it on the ground
Image

Image

Image

Image

Image


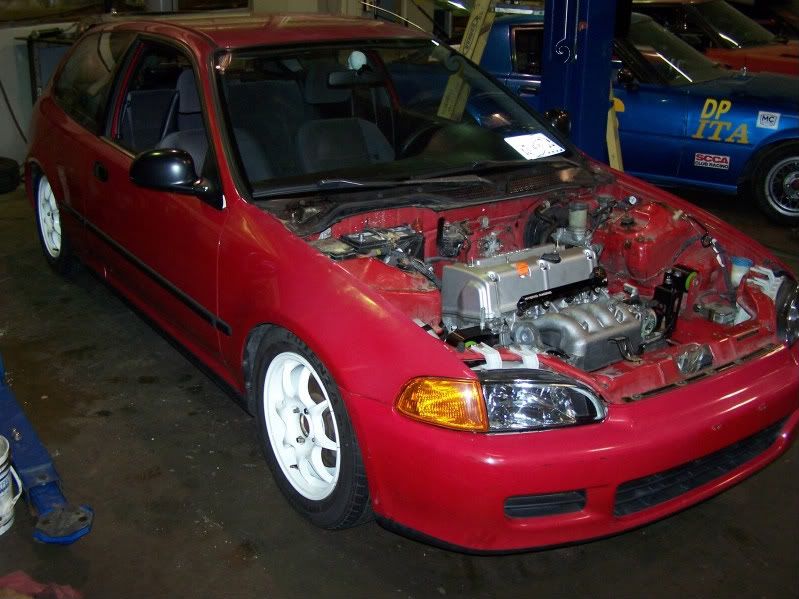
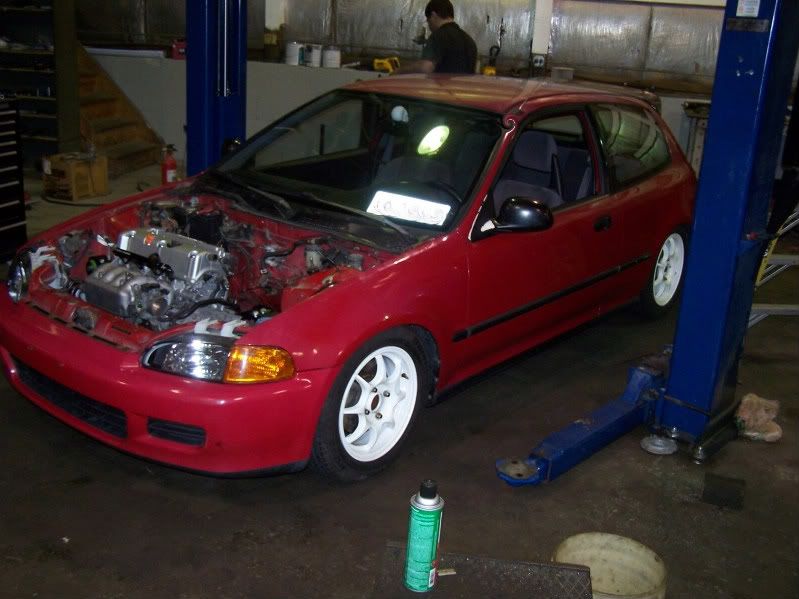
All loaded back on the trailer and ready to go home at 6am sunday night/monday morning
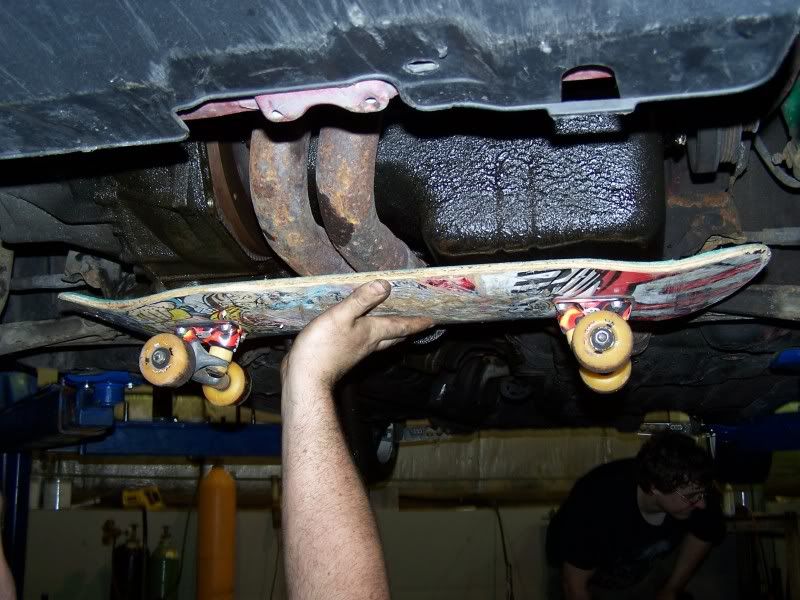
Image


**** you single cam
Image


So a major amount of the work is done on the vehicle, i owe a lot to my friends will and mike that helped out, for a while through the night i could do anything, i was violently nauseous and puking like crazy. but they took over and asked when they needed too.

the cars sitting back in my garage right now, i gotta make a charge harness, run the wiring harness, i'm not sure if i wanna tuck it or just make it run. Still gotta put the radiator in, the car needs a hood latch and cable.. but i'm happy :D

it was a lot of work, hope you guys enjoy. i'll be posting in again with updates

And yes i'm well aware the engine bay needs cleaning, unfortunatly the power washer was broken
 
#17 ·
Man, this is like a speed build! I feel like a turtle at the pace I'm moving at. I've got a few questions. If you're swapping out the old 4 lug, why not go 5? (Yeah, I know you've got a nice collection of 4 lug wheels but besides that).

Also, noticed you placed the engine more forward. Why is that? I thought putting more of the weight behind the axle would have been better.

So, was the EF done before you parted it out?
 
#18 ·
Holy crap I hadn't even noticed I was using the forward mounting holes. I kept thinking it looked like it was sitting more forward than it should. Dammit gotta change that now. I went big 4lug because I traded my old built B16 from my EF for the Sprint Harts and the big 4lug. Otherwise I would have kept my Koseis and used my front/rear wilwood big brake kits.

As far as the EF goes, I got the car to running/driving, but was planning a dyno break in on the motor. Life got in the way and it Never made it over to my buddies shop, that was fall/winter. About the same time everything came together to start this build.

Don't feel too bad about my progress. I work in a Toyota service dept as an advisor and due to the recall ended up with three of the biggest checks I've ever received in my life
 
#19 ·
Glad I could help. I noticed you had your passenger side mount on the rear location. And based on the tranny mount, looked like it was originally on the rear spacing as well.

I like how you used the skateboard. Just realized how handy one could come in.

I also feel your pain on the seized trailing arm bolt/bushing. Had the same problem. I ended up drilling into the end of the bolt and then used a tap to clean up the threads on the welded nut. I had actually popped that nut out before on another trailing arm with seized bushing as it somehow pushed the nut out.
 
#21 ·
Hell yea dude the skateboard makes moving engines very easy, only gotta lift it up a minimal amount.

Yea those bushings suck, thank god I didnt care and just hacked everything with a torch :p that shit was fun.

So Sunday I drove to Joliet to go pick up fuel lines/fittings from Winners Circle in Joliet. It should take me a little over an hour to get there, it actually took almost 2hrs. There was construction everywhere! I avoided the highways cause everyone on here from Chicago knows how shot that shit is. So i took a way outside way that should have been pretty quick... Construction! After making a couple wrong turns I finally got there at 3:45 and they closed early for Mothers Day. I missed them being open by a few minutes. So now i gotta drive all the way back out there again... maybe I'll take a day off work tomorrow....

I'm gonna setup the hoist and move the motor to the right spot, still can't believe i did that lol. Should have fuel lines in place this week. One of my friends is supposed to be getting me axles in exchange for the header off my EF, but I may just buy axles cause I'm gettin sick of waiting.

I'm helping my roommate rebuild my old D15B so he can put it in his coupe. :dance:

oh and Hell Yeah on the shirt point out. I have to tell him about that haha
 
#22 ·
I used a grinder. That was fun. I don't have a torch. :( Should have tried to save the trailing arm though!

Crappy deal with missing the fuel lines and fittings by a few min. Hate how that happens...
 
#25 ·
When it comes time for a tune the cars going over to my buddies shop, Benchmark Tuning, in Melrose Park. They're primarily a Subaru shop, but they'll work on anything that comes through the door that somebody wants made faster. My friend Matt over there travels around the country tuning, and he's looking forward to playin with a Kseries:up:
 
#28 ·
I should have some decent update pix soon here, too lazy to upload and all that BS right now. I've made a fair amount of progress in the last few days though.

I took Weds off work and again drove down to winners circle and bought all my fuel line and fittings, now I just need to assemble it all and route the line. went and got two new radiator cushions from Honda since my original ones were hard as rocks. Picked up a pair of axles from Advance Auto Parts and swapped the inner joints. I also corrected the positioning of my motor (doh!)

I'll have better updates soon. I'm hopin to be drivin the car in the next 2-3 weeks
 
#29 ·
Nice progress!

I had hoped to finish mine up this month, but who knows if that will happen. I have ran into so many problems since I got my K swap.

So what holes did you end up using for the engine position? I am using basically the same mounts. I will also be using modded stock axles as well. I think the placement of the engine in regards to those bolt holes on the driver and passenger side mount has something to do with what type of axles you use.
 
#30 ·
thanks. In regards to mount position and modified stock axles, you want to use the rearward mounting points of the Hybrid mounts. That would translate to the Forward trans mount, and rearward passenger and rear mount.

You would want to use the Forward mounting position if you're using DSS 2.9's and higher, due to the overall longer length of the axle so as to prevent driveshaft bind up on turning. the forward mounting point give them a bit more room to rotate
 
#32 ·
Its easy, jus a bit messy. A hammer and a vise or solid place to hold the axle while u beat off the outers helps.
 
#33 ·
not even... I took some pics of it that i'll post up.

all you have to do is take the clamp off the boot where it seals to the outer joint, and the inside cup literally pulls right off. the only tools i used were a screwdriver to open the particular clamp on my axles (bought from advance auto parts for $150) a vise to hold the axle, and a pair of pliers to pull the band clamp tight.

Dont be intimidated, it really not as big of a project as it seems. if you have questions PM me, but seriously just try it and you'll be amazed how easy it is. it didnt take more than 5-10min:up:
 
#34 ·
ok so i completely failed at keeping this thread updated... my life got pretty crazy for a while here and the car was put on the backburner for a bit until i couldnt stand it and pretty much finished everything in a couple day. my camera broke so i finally was able to snap a few pics of the car now

Image


Image


Image


Image


Image

-3deg of camber for the rear to fit flush
Image


Image


Image

MONEY SHOT!!

Yea the Engine bay is dirty as hell but i'm not worried about it for now, i'm just enjoying driving the car. when i have the car repainted (hopefully over winter) i'll worry about makin it look great then